Welcome To My Blog
How To Make baby leg warmers out of adult socks.
Start with buying a pair of knee high adult socks , the print can be as wild or tame as you want.
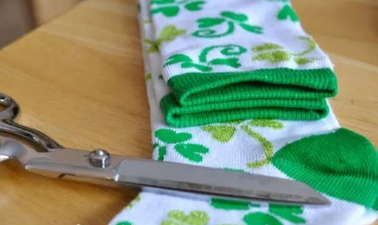
Get ready to cut , you are going to use the foot part of the sock to make your cuff for your leg wamers , you will see what I mean.
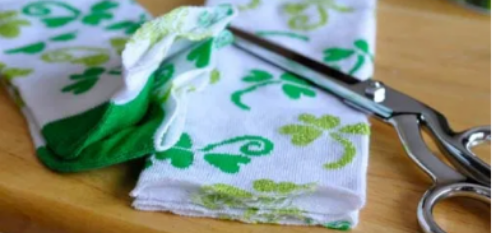
Make sure to cut a line straight across , you can use a ruler I just eye ball it.
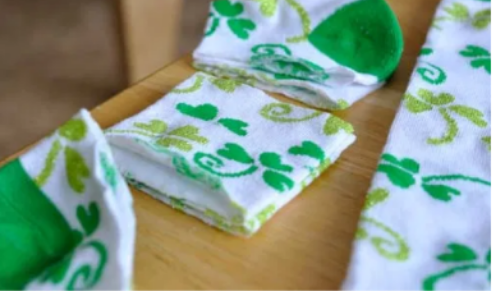
Now cut the heel and toe off your sock , try to strive for straight lines like before , save the center part , this is going to be used for the cuff of the leg warmer.
Now fold the center of your sock "foot part" in half so that you have a clean fold on one side & the rough sides are together as shown above in picture.
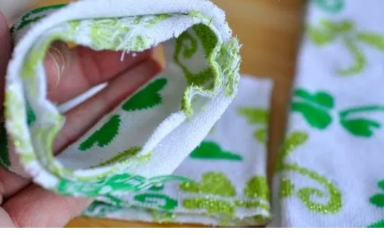
Put the tube you just folded around the main part of the sock, lining up the rough edges of the small folded tube & the main tube of the sock.
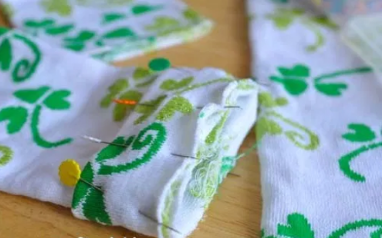
Pin the tube in place in prep for sewing.
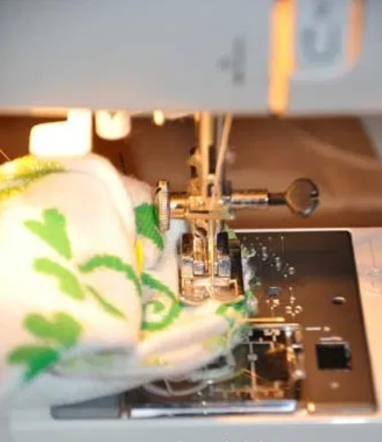
Slowly sew the two sock pieces together. Be sure to backstitch.

Now your round edges are connected as shown above, remove the pins and you are done. You are done for real!
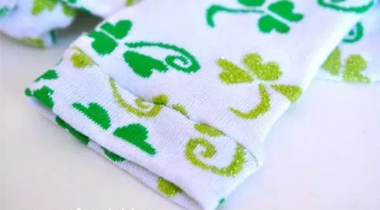
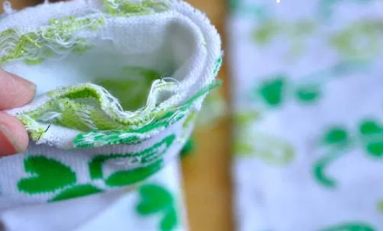
Push the rough ends in and you will see what I mean , now you are really done.
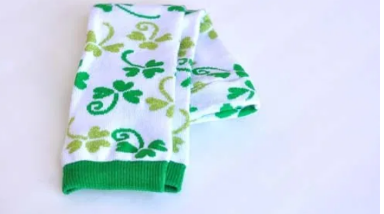
Vioila! You could make a ton of these in one hour & these can easily be made during nap times. They also would make fabulous cheap , personal baby shower gifts , dont you think?
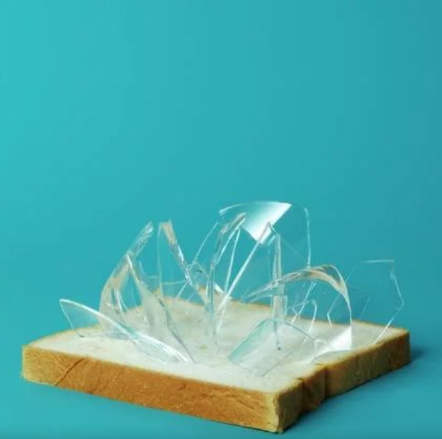
“One small crack does not mean that you are broken, it means that you were put to the test and you didn’t fall apart.

Promise Yourself
To be so strong that nothing can disturb your peace of mind.
To talk health, happiness, and prosperity to every person you meet.
To make all your friends feel that there is something worthwhile in them.
To look at the sunny side of everything and make your optimism come true.
To think only of the best, to work only for the best and to expect only the best.
To be just as enthusiastic about the success of others as you are about your own.
To forget the mistakes of the past and press on to the greater achievements of the future.
To wear a cheerful expression at all times and give a smile to every living creature you meet.
To give so much time to improving yourself that you have no time to criticize others.
To be too large for worry, too noble for anger, too strong for fear, and too happy to permit the presence of trouble.
To think well of yourself and to proclaim this fact to the world, not in loud word, but in great deeds.
To live in the faith that the whole world is on your side, so long as you are true to the best that is in you.
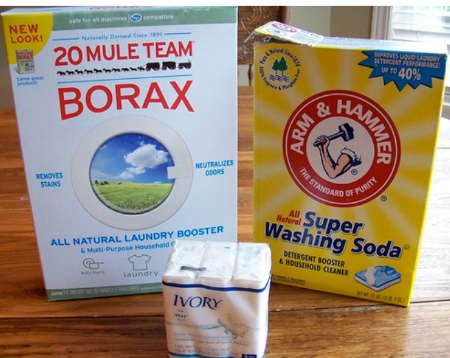
Homemade Laundry IngredientsGenerally, you can purchase all these DIY laundry detergent ingredients at your local grocery store:
- A 55-ounce box of Arm & Hammer® Super Washing Soda = $3.99
- 76-ounce box of 20 Mule Team® Borax = $4.99
- 10 pack of 4.5-ounce bars of Ivory® Bar Soap
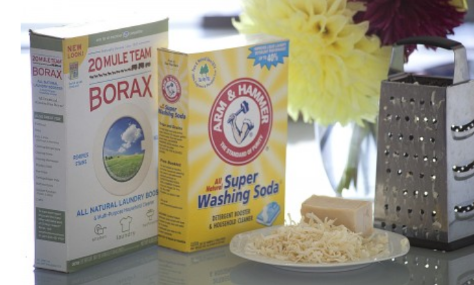
HOMEMADE LAUNDRY SOAP RECIPEPrep time: 5 minutesCook time: 10 minutesTotal time: 15 minutesYield: 76 laundry loadsINGREDIENTS
- 2 oz
grated plain soap - 1/2 cup (5 oz)
washing soda - 1/2 cup (3 oz)
borax
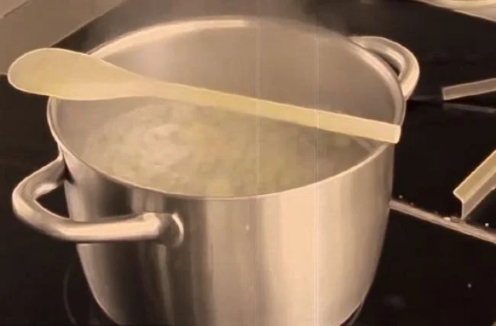
- Place grated soap in a very large pot with 6 cups of water. Heat on high until soap begins to melt.
- Add the washing soda and borax and stir well until everything is dissolved.
- Fill your storage container with 13 cups of hot (not boiling) water. Add the soap mixture to the container and stir or seal and shake.
- Let sit 24 hours until it has formed a watery gel (kind of like egg drop soup!).
- Use 1/4 cup of soap per laundry load.
This breaks down to $2.61 for 76 loads of laundry. or three cents per load.
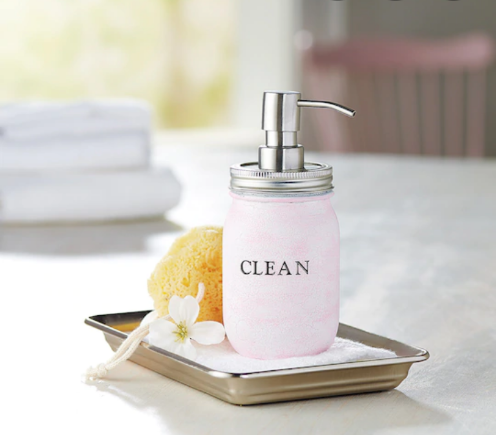
DIY Homemade Dish Soap Recipe
Ingredients
Instructions
Ingredients
- 1/2 cup warm filtered water
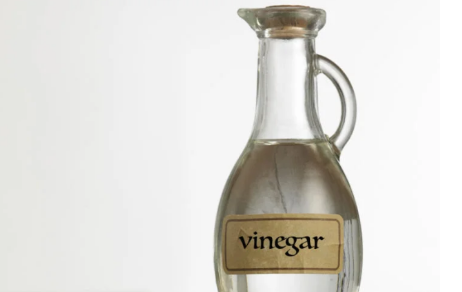
- 1/2 cup white distilled vinegar
- 1/2 cup Dr. Bronners Sal Suds
- 1 tablespoon kosher or sea salt
- 25 drops lemon essential oil
Instructions
- In a medium sized bowl combine warm water and salt and stir until the salt is completely dissolved.
- In a separate bowl, combine Sal Suds and vinegar. Stir until fully combined.
- Stir Sal Suds/vinegar mixture into salt water mixture and continue stirring until thickened.
- Store in a squirt bottle (a recycled dish soap container well)

How to Make Your Own Candles
Supplies
candle making supplies wax wicks jars
To get started making candles, you’ll need a few supplies and tools. The startup cost is still relatively low though, and once you have your supplies in place, you’ll be able to create numerous inexpensive candles.
Wax. This is obviously the heart of the candle. There are three primary types to choose from in the candle-making world. Let’s take a quick look at each:
Paraffin. The traditional wax used in candle-making for hundreds of years, and is still the most popular ingredient for candles on the shelves today. It’s cheap, and you can easily add colors and scents. The primary concern with paraffin is its potentially toxic nature. Paraffin is a petroleum byproduct, which automatically gives it a bad name for some folks. If all-natural products are your thing, it’s probably best to seek an alternative wax. Price: $2-$10 per lb.
Soy. The newcomer on the block, and becoming more and more popular. It was created in the ’90s when the “natural” movement started to gain steam. It’s generally made with soybean oil, but also sometimes blended with paraffin and other waxes (palm, bees, etc.). It also easily accepts colors and scents. Price: $2-$10 per lb.
Beeswax. The oldest candle-making ingredient; in fact, beeswax candles have been found in the great pyramids of Egypt. As the name implies, it’s produced by bees, and is a byproduct of the honey-making process. Because of that, it has a naturally golden color, as well as a subtle, sweet scent. It’s obviously a completely natural product, but you won’t be able to add other fragrances to it very effectively; the natural scent will interfere with any that you try to artificially add. It’s also the most expensive option. Price: $10+ per lb.
Most waxes you buy for candle-making will come in pellet form, making it much easier to work with, and much quicker to melt. If it does come in a block (my paraffin did), use a sharp knife to chop it into smaller chunks.
In my experiments, beeswax performed the worst of the waxes. It just didn’t burn as well as the others. And with no scent (I couldn’t detect much of the supposed natural scent), it sort of defeats one of the purposes of having a candle anyway. I didn’t notice too much of a difference between the soy and paraffin candles; user preference wins out there.
Wicks. The wrong wick can ruin your homemade candle. Your primary concern is size, which is really width. For the container candles that I’m guiding you through, you’ll almost always want a large wick (most are simply sized “small,” “medium,” or “large”). Since your candle likely has a diameter of a few inches, the larger wick is the way to go. Length of wick doesn’t matter much; you’ll probably be trimming it down no matter what.
Fragrance Oils. Without fragrance, you just have burning wax. While it looks nice, it doesn’t create the pleasing aroma that today’s candles are largely made for. There are thousands of scents to choose from that are just a google search away. I used candlescience.com to buy specially formulated candle fragrances. You can use essential oils, but from what I’ve researched, the final product doesn’t end up as nice. Choose from such masculine scents as Fireside (a blend of clove, amber, and sandalwood), Apples & Maple Bourbon, Blue Spruce, Buttered Rum, Coffee, Whiskey, and more.
Double Boiler. You can use a true double boiler if you’d like, but I went with a universal model that just sits on top of any pot you already have, and it’s worked great. Best of all, it’s cheap, and easily storable in a cupboard. This is definitely a must for candle-making; melting the wax directly over the flame in a normal pot is too hot.
Container(s). Coffee mugs, glassware, mason jars — anything that can withstand heat can be used as a container for a candle. I bought some 8oz mason jars, and they’ve been just right (cheap, too!). Having a lid makes them a breeze to transport/ship as well, so you can easily give them as gifts.
Accessories: Thermometer, Spatula, Old Pen(s), etc. Having a thermometer on hand is nice so you can quickly take the temperature of the wax. When you buy wax, especially some that’s designed for candle-making, it comes with instructions as to which temperature to add fragrance, when to pour into the container, etc. Use a spatula or spoon to stir the wax and break up larger chunks. Later, you’ll find out why old pens/pencils come in handy. As you go along, you may also find some little things you need; just be prepared for wax to end up on everything.
Note: The majority of the images below are from making the beeswax candle; the color of the wax makes it easier to see what’s going in images rather than the perfectly clear wax (until it sets and hardens, of course) of paraffin and soy. The process is literally exactly the same for all the wax types.
How to Make Your Own Container Candle 1. Prepare the Work Area
Dealing with wax is a rather messy affair. Especially as it melts, droplets can get anywhere and everywhere, and you won’t even know it until the wax dries. Set up newspaper or paper towels around your work area. Use those to set your thermometer, spatula, etc. on; beware, they’ll probably stick a little bit. Thankfully, wax isn’t that hard to clean (even though it may be a bit laborious), and you can usually just scrape it off with a fingernail. Also have your jars (or other containers) and wicks at the ready; once it gets going, the process goes a little quicker than you might initially expect.
2. Melt the Wax
candle wax beeswax melting in double boiler
homemade diy candles beeswax melting on stove
homemade candles beeswax melting in double boiler
Using your double boiler, melt the wax. Put a good amount of water in the bottom pan, put about half a pound of wax in the double boiler (this makes the perfect amount to fit in an 8oz mason jar), and watch it melt. It’s actually pretty fun to watch. Stir it and break up big chunks with the spatula. It only takes 10-15 minutes for the wax to melt. Be sure to keep an eye on the temperature; you want it to generally be around between 160 and 170 degrees. If it gets higher than that, take it off the heat.
3. Adhere Wick to Container
dipping wick in wax homemade diy candles
homemade candles placing wick in jar wax
While the wax is melting, adhere the wick to the container. Some wicks have a little sticker built-in on the bottom, but most do not. Super glue is one option, but I actually used an old candlemakers trick with great success: As the wax starts melting, it’ll form a pool of liquid. Dip the metal tab of the wick into that melted wax, then quickly adhere it to the bottom of the container — centered of course. After just a couple minutes when the wax hardens, it’ll be stuck solid to the bottom.
4. Add Fragrance Oils and Stir
homemade diy candles adding fragrance to wax
Adding fragrance oil to the paraffin wax.
After all the wax is completely melted, add your desired fragrance oils. Each wax is different and requires different amounts per pound of wax, so follow the instructions that come with it if you’ve purchased candle wax specifically. If you bought a block of wax which isn’t necessarily just for candles, a safe bet would be 1 oz per pound of wax. Pour the fragrance into your double boiler, and stir for 30 seconds or so to ensure it’s evenly distributed.
5. Cool, and Pour Into Container
homemade diy container candle pouring wax
After you’ve added the fragrance oil, let it cool for a couple minutes. The optimal temp to pour your wax into the container is around 130-140 degrees; it sets better that way than if poured hotter. This doesn’t take very long — just a few minutes — so pay attention to your thermometer.
Once the wax is properly cooled, go ahead and pour it into the container. Keep a light hold on the wick so that it stays in the center; don’t tug too hard though or the adhesion to the bottom could be released. Since you’re pouring in hot wax which could melt the wax you used to stick the wick, that could happen anyways. If I gave the wax enough time to harden — 5 minutes or so — it didn’t seem to be a problem for me.
Don’t pour all the wax just yet, though. Save some in your boiler for after the initial pour sets. You’ll notice that it generally gets a nice sinkhole in the center. We’ll come back to that in just a couple steps.
7. Secure Wick
homemade diy container candle securing wick in place
The wick, while attached to the bottom, may at first do some swaying in the liquid wax. You obviously want to ensure it stays nice and centered while the wax sets and hardens. Having an off-center wick means it won’t burn properly, and you don’t want that. Simply place a writing utensil or two (ones you don’t care a whole lot about) on top of the container with the wick in between. The wick doesn’t need to be super secured — it just needs to stay in place for a couple hours.
8. Let Cool, Then Top Off
homemade container candle beeswax sinkhole
You’ll notice a small sinkhole in the center; the wax is also pulling away from the edges of the jar a little bit. Topping it off cures these problems.
homemade diy container candles top off trim wick
As mentioned above, while the wax sets, it’ll likely form a sinkhole in the middle. You’ll have to let it cool for at least a few hours; it takes that long for the wax to fully set and for you to see how much it needs to be filled in. Re-heat the wax that you left in the boiler and top off the candle. Don’t add too much, or you may end up with another hole; just fill in the depression, adding a touch above what was already there for a smooth surface.
9. Trim Wick
You’ll probably have a few inches of wick sticking up from your candle. You’ll want to trim that down to just about 1/4″. A wick that’s too long will burn too big and hot. The way to know is by looking at the flame once it’s lit: if the flame is more than inch or so high, and flickers a lot, it’s too long. Trim it and light again.
10. Clean Up
You’re probably wondering how to clean up all that wax. Even doing the best you can, you won’t be able to get every drop into the container. There will be some in the boiler, on your tools, probably on your countertops, etc. The best way to clean it is to wipe the wax away with a paper towel while it’s still in liquid form. You don’t want to rinse it down the drain or put the tools in the dishwasher; while the wax will easily melt off, it can harden again and clog up your pipes. That’s why a paper towel or other disposable rag is the way to go. If the wax does harden before you’re able to clean it up, it thankfully scrapes off of just about anything pretty easily, so don’t fret too much.
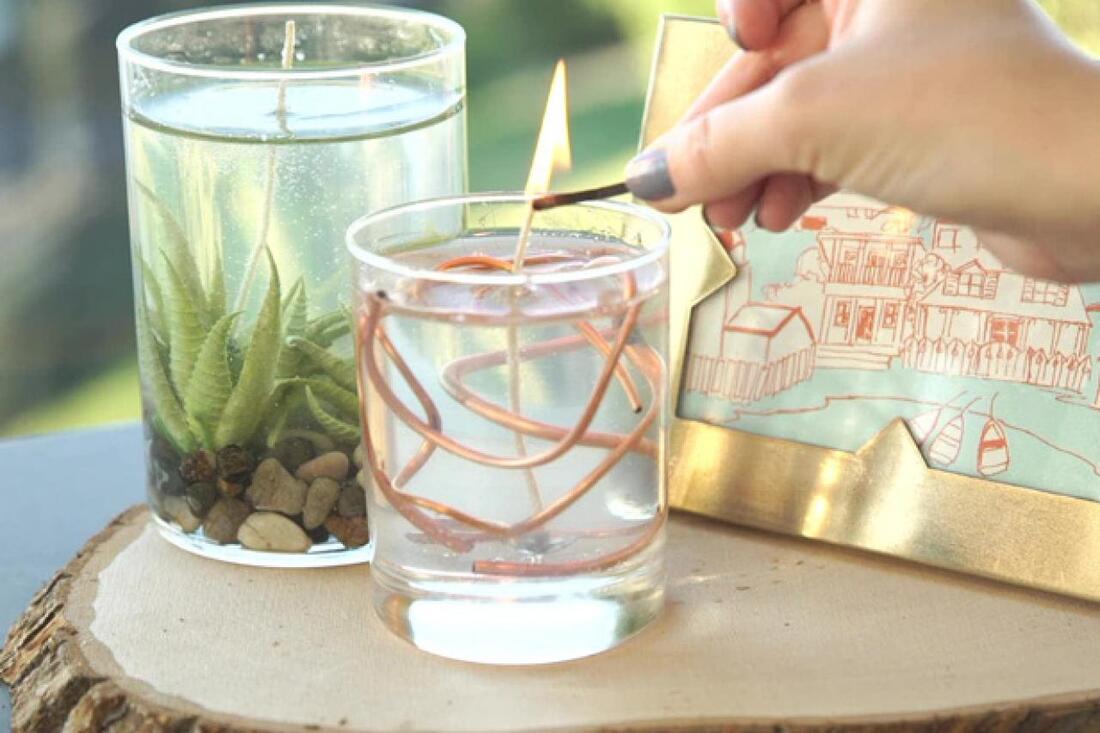
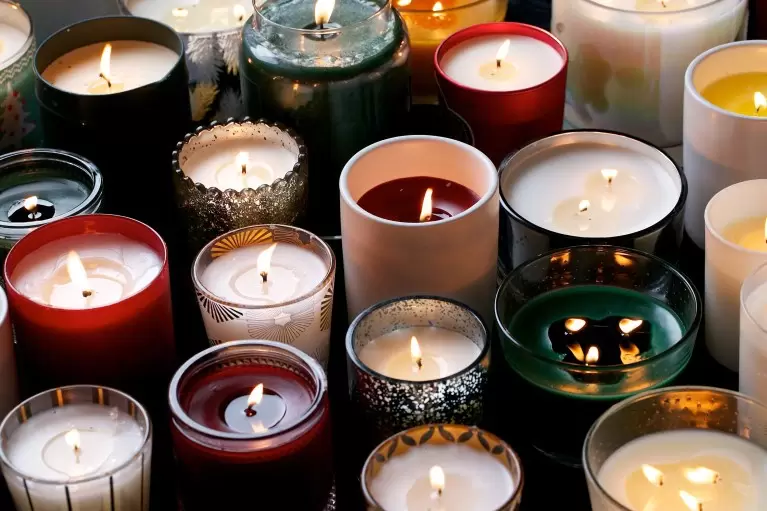
11. Enjoy Your Candle!
Supplies
candle making supplies wax wicks jars
To get started making candles, you’ll need a few supplies and tools. The startup cost is still relatively low though, and once you have your supplies in place, you’ll be able to create numerous inexpensive candles.
Wax. This is obviously the heart of the candle. There are three primary types to choose from in the candle-making world. Let’s take a quick look at each:
Paraffin. The traditional wax used in candle-making for hundreds of years, and is still the most popular ingredient for candles on the shelves today. It’s cheap, and you can easily add colors and scents. The primary concern with paraffin is its potentially toxic nature. Paraffin is a petroleum byproduct, which automatically gives it a bad name for some folks. If all-natural products are your thing, it’s probably best to seek an alternative wax. Price: $2-$10 per lb.
Soy. The newcomer on the block, and becoming more and more popular. It was created in the ’90s when the “natural” movement started to gain steam. It’s generally made with soybean oil, but also sometimes blended with paraffin and other waxes (palm, bees, etc.). It also easily accepts colors and scents. Price: $2-$10 per lb.
Beeswax. The oldest candle-making ingredient; in fact, beeswax candles have been found in the great pyramids of Egypt. As the name implies, it’s produced by bees, and is a byproduct of the honey-making process. Because of that, it has a naturally golden color, as well as a subtle, sweet scent. It’s obviously a completely natural product, but you won’t be able to add other fragrances to it very effectively; the natural scent will interfere with any that you try to artificially add. It’s also the most expensive option. Price: $10+ per lb.
Most waxes you buy for candle-making will come in pellet form, making it much easier to work with, and much quicker to melt. If it does come in a block (my paraffin did), use a sharp knife to chop it into smaller chunks.
In my experiments, beeswax performed the worst of the waxes. It just didn’t burn as well as the others. And with no scent (I couldn’t detect much of the supposed natural scent), it sort of defeats one of the purposes of having a candle anyway. I didn’t notice too much of a difference between the soy and paraffin candles; user preference wins out there.
Wicks. The wrong wick can ruin your homemade candle. Your primary concern is size, which is really width. For the container candles that I’m guiding you through, you’ll almost always want a large wick (most are simply sized “small,” “medium,” or “large”). Since your candle likely has a diameter of a few inches, the larger wick is the way to go. Length of wick doesn’t matter much; you’ll probably be trimming it down no matter what.
Fragrance Oils. Without fragrance, you just have burning wax. While it looks nice, it doesn’t create the pleasing aroma that today’s candles are largely made for. There are thousands of scents to choose from that are just a google search away. I used candlescience.com to buy specially formulated candle fragrances. You can use essential oils, but from what I’ve researched, the final product doesn’t end up as nice. Choose from such masculine scents as Fireside (a blend of clove, amber, and sandalwood), Apples & Maple Bourbon, Blue Spruce, Buttered Rum, Coffee, Whiskey, and more.
Double Boiler. You can use a true double boiler if you’d like, but I went with a universal model that just sits on top of any pot you already have, and it’s worked great. Best of all, it’s cheap, and easily storable in a cupboard. This is definitely a must for candle-making; melting the wax directly over the flame in a normal pot is too hot.
Container(s). Coffee mugs, glassware, mason jars — anything that can withstand heat can be used as a container for a candle. I bought some 8oz mason jars, and they’ve been just right (cheap, too!). Having a lid makes them a breeze to transport/ship as well, so you can easily give them as gifts.
Accessories: Thermometer, Spatula, Old Pen(s), etc. Having a thermometer on hand is nice so you can quickly take the temperature of the wax. When you buy wax, especially some that’s designed for candle-making, it comes with instructions as to which temperature to add fragrance, when to pour into the container, etc. Use a spatula or spoon to stir the wax and break up larger chunks. Later, you’ll find out why old pens/pencils come in handy. As you go along, you may also find some little things you need; just be prepared for wax to end up on everything.
Note: The majority of the images below are from making the beeswax candle; the color of the wax makes it easier to see what’s going in images rather than the perfectly clear wax (until it sets and hardens, of course) of paraffin and soy. The process is literally exactly the same for all the wax types.
How to Make Your Own Container Candle 1. Prepare the Work Area
Dealing with wax is a rather messy affair. Especially as it melts, droplets can get anywhere and everywhere, and you won’t even know it until the wax dries. Set up newspaper or paper towels around your work area. Use those to set your thermometer, spatula, etc. on; beware, they’ll probably stick a little bit. Thankfully, wax isn’t that hard to clean (even though it may be a bit laborious), and you can usually just scrape it off with a fingernail. Also have your jars (or other containers) and wicks at the ready; once it gets going, the process goes a little quicker than you might initially expect.
2. Melt the Wax
candle wax beeswax melting in double boiler
homemade diy candles beeswax melting on stove
homemade candles beeswax melting in double boiler
Using your double boiler, melt the wax. Put a good amount of water in the bottom pan, put about half a pound of wax in the double boiler (this makes the perfect amount to fit in an 8oz mason jar), and watch it melt. It’s actually pretty fun to watch. Stir it and break up big chunks with the spatula. It only takes 10-15 minutes for the wax to melt. Be sure to keep an eye on the temperature; you want it to generally be around between 160 and 170 degrees. If it gets higher than that, take it off the heat.
3. Adhere Wick to Container
dipping wick in wax homemade diy candles
homemade candles placing wick in jar wax
While the wax is melting, adhere the wick to the container. Some wicks have a little sticker built-in on the bottom, but most do not. Super glue is one option, but I actually used an old candlemakers trick with great success: As the wax starts melting, it’ll form a pool of liquid. Dip the metal tab of the wick into that melted wax, then quickly adhere it to the bottom of the container — centered of course. After just a couple minutes when the wax hardens, it’ll be stuck solid to the bottom.
4. Add Fragrance Oils and Stir
homemade diy candles adding fragrance to wax
Adding fragrance oil to the paraffin wax.
After all the wax is completely melted, add your desired fragrance oils. Each wax is different and requires different amounts per pound of wax, so follow the instructions that come with it if you’ve purchased candle wax specifically. If you bought a block of wax which isn’t necessarily just for candles, a safe bet would be 1 oz per pound of wax. Pour the fragrance into your double boiler, and stir for 30 seconds or so to ensure it’s evenly distributed.
5. Cool, and Pour Into Container
homemade diy container candle pouring wax
After you’ve added the fragrance oil, let it cool for a couple minutes. The optimal temp to pour your wax into the container is around 130-140 degrees; it sets better that way than if poured hotter. This doesn’t take very long — just a few minutes — so pay attention to your thermometer.
Once the wax is properly cooled, go ahead and pour it into the container. Keep a light hold on the wick so that it stays in the center; don’t tug too hard though or the adhesion to the bottom could be released. Since you’re pouring in hot wax which could melt the wax you used to stick the wick, that could happen anyways. If I gave the wax enough time to harden — 5 minutes or so — it didn’t seem to be a problem for me.
Don’t pour all the wax just yet, though. Save some in your boiler for after the initial pour sets. You’ll notice that it generally gets a nice sinkhole in the center. We’ll come back to that in just a couple steps.
7. Secure Wick
homemade diy container candle securing wick in place
The wick, while attached to the bottom, may at first do some swaying in the liquid wax. You obviously want to ensure it stays nice and centered while the wax sets and hardens. Having an off-center wick means it won’t burn properly, and you don’t want that. Simply place a writing utensil or two (ones you don’t care a whole lot about) on top of the container with the wick in between. The wick doesn’t need to be super secured — it just needs to stay in place for a couple hours.
8. Let Cool, Then Top Off
homemade container candle beeswax sinkhole
You’ll notice a small sinkhole in the center; the wax is also pulling away from the edges of the jar a little bit. Topping it off cures these problems.
homemade diy container candles top off trim wick
As mentioned above, while the wax sets, it’ll likely form a sinkhole in the middle. You’ll have to let it cool for at least a few hours; it takes that long for the wax to fully set and for you to see how much it needs to be filled in. Re-heat the wax that you left in the boiler and top off the candle. Don’t add too much, or you may end up with another hole; just fill in the depression, adding a touch above what was already there for a smooth surface.
9. Trim Wick
You’ll probably have a few inches of wick sticking up from your candle. You’ll want to trim that down to just about 1/4″. A wick that’s too long will burn too big and hot. The way to know is by looking at the flame once it’s lit: if the flame is more than inch or so high, and flickers a lot, it’s too long. Trim it and light again.
10. Clean Up
You’re probably wondering how to clean up all that wax. Even doing the best you can, you won’t be able to get every drop into the container. There will be some in the boiler, on your tools, probably on your countertops, etc. The best way to clean it is to wipe the wax away with a paper towel while it’s still in liquid form. You don’t want to rinse it down the drain or put the tools in the dishwasher; while the wax will easily melt off, it can harden again and clog up your pipes. That’s why a paper towel or other disposable rag is the way to go. If the wax does harden before you’re able to clean it up, it thankfully scrapes off of just about anything pretty easily, so don’t fret too much.
11. Enjoy Your Candle!

DIY Workout Headband
Makes one chic headband
You could make up to 3 headbands depending on the size of your shirt & amount of fabric left! Ingredients:
1 old T-shirt
1 pair of scissors
1 piece of tape
30 minutes
1. Start with a large T-shirt. Any old shirt will do! Seamless is a plus!
2. Cut off the bottom hem of the shirt. Then cut five 1in wide strips horizontally across the shirt starting from the bottom. You can use a ruler to guide a straight line across the shirt, but don’t worry if they aren’t perfect.
3. Set the bottom hem aside. Stretch all of the remaining strips until they become long, and the raw edges start to roll inwards.
4. Cut the five strands in half so they become long strands (instead of circles).
5. Gather the five strands, and secure them onto a hard surface with tape. This will make it easier for you to braid. Take the outside left strand and place it one over to the right.
6. Take the middle strand and place it one over to the left.
7. Take the outside right strand and place it one over to the left.
8. Take the middle strand and place it one over to the right.
9. Have you noticed the pattern? outside over one to the right, middle over one to the left, outside over one to the left, middle over one to the right … work from the left three strands, to the right 3 strands. Keep repeating these steps (9-12 are the same as 5-8)! Take the outside left strand and place it one over to the right.
10. Take the middle strand and place it one over to the left.
11. Take the outside right strand and place it one over to the left.
12. Take the middle strand and place it one over to the right.
13. Once you have finished braiding, trim the headband to fit your head, leaving about an inch on each end for knotting.
14. Start by double knotting one strand from each end of the braid together.
15. Match each end with another strand from the opposite end and double knot.
16. Trim the ends off of the double knots, and you’re done!
Tadaaaa! A chic headband for your next workout! You could even make 2 or 3 headbands out of one shirt, woo!
Post or email your photos if you make a headband! I can’t wait to see your creations!

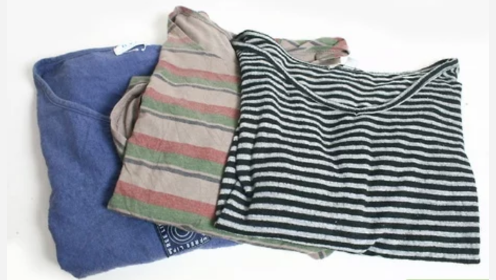
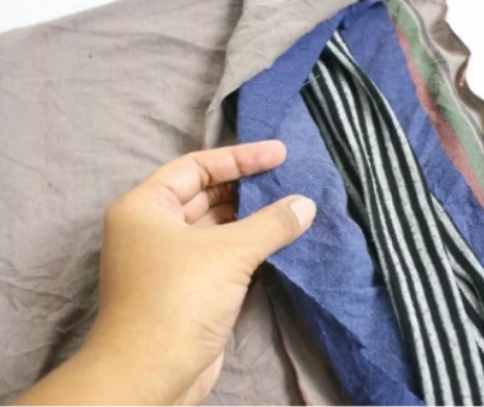
- Choose three t-shirts that are relatively the same size and shape.
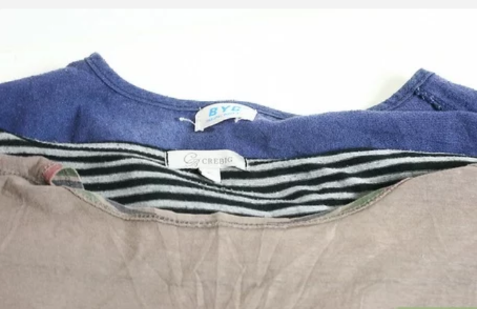
Turn the t-shirts inside out.
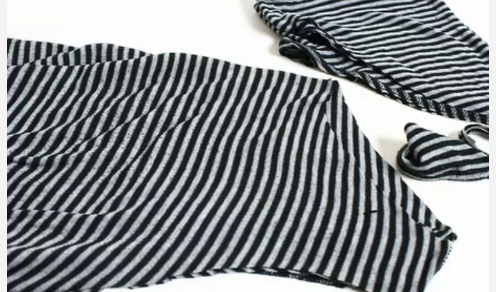
Using scissors, remove the neckbands, sleeves and lower hems.
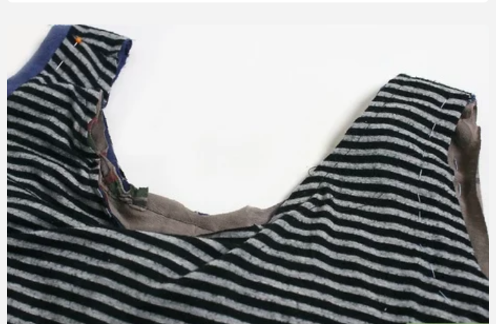
Cut the neckline, at the front and back of the t-shirts, to resemble the scooped neckline of a tank top. The shoulder straps will become the handles.
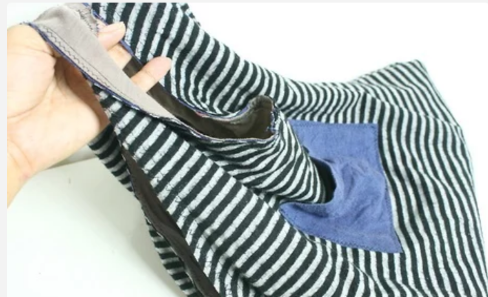
Layer all of the t-shirts together. Place one inside the other.
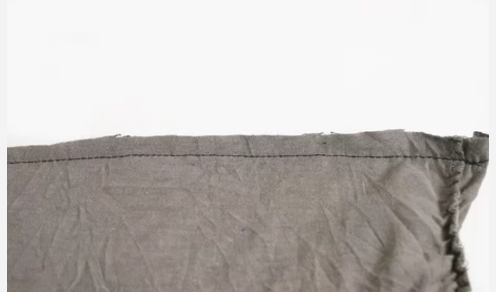
Stitch the bottom back together. Stitch from one side seam to the other.
Miter the lower corners of the bag to add strength and support.
Turn the bag right side out.
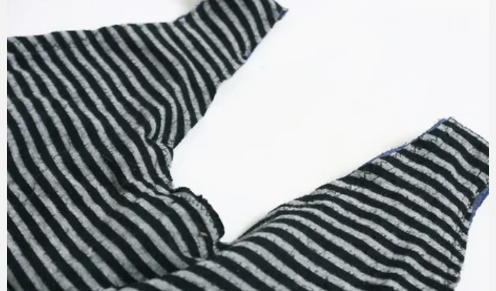
Using the sewing machine, place a running stitch through all three layers of the neckline and armholes. Place an additional zigzag stitch on top of each of the running stitches.
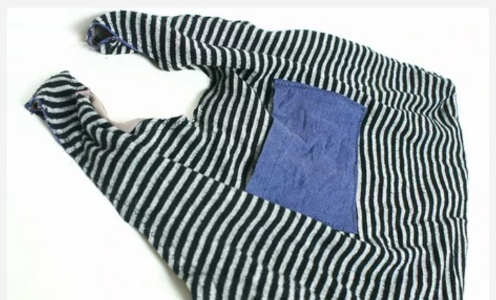
Add pockets, if desired. Attach pockets to the inside or outside of the bag, in various shapes or sizes, depending upon your needs.
Place two thick strips of cardboard in the bottom of the bag for further support. Make the cardboard the exact width of the miter and exact length of the base of the bag for a snug fit.
1.
2.
3.
4.
5.
6.
7.
8.
9.

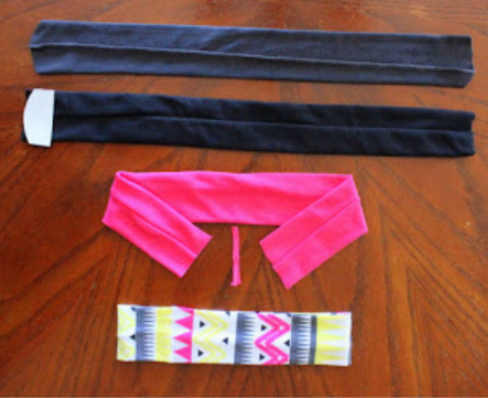
Steps (from bottom to top):
- (Multi-colored) Original headband with no alterations.
- (Pink) I cut the headband in half on both sides of the sewed seam.
- (Black) I made a curved template and cut the edges so that they were curved.
- (Gray) I turned the headband inside out.
This is the fabric glue I used. After you use it, it needs to dry for 24 hours
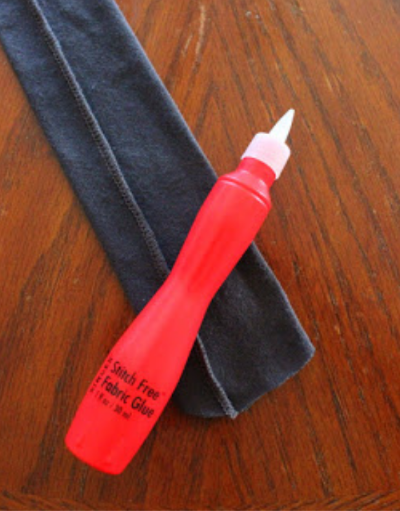
I glued the curved edges together, leaving just a few millimeters of room along the edges.

Steps (from bottom to top):
- (Multi-colored) I cut a small slit in the middle of the headband along the sewed seam.
- (Gray) I pulled one end through the hole.
- (Pink) I pulled the other end through the hole.
- (Black) Completely flipped inside out and turned over.
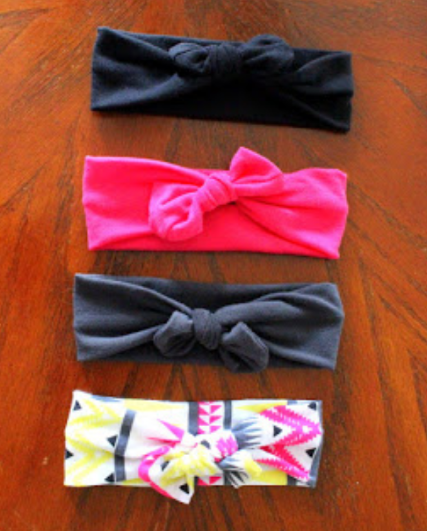
I double knotted the headbands and made sure the knot was pulled tight. The seam is on the inside of the headband, so that little hole I cut is not visible
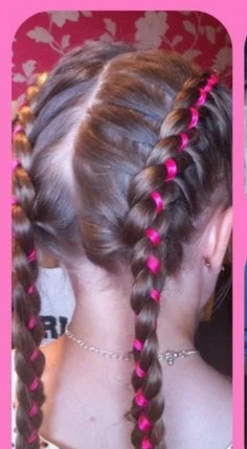
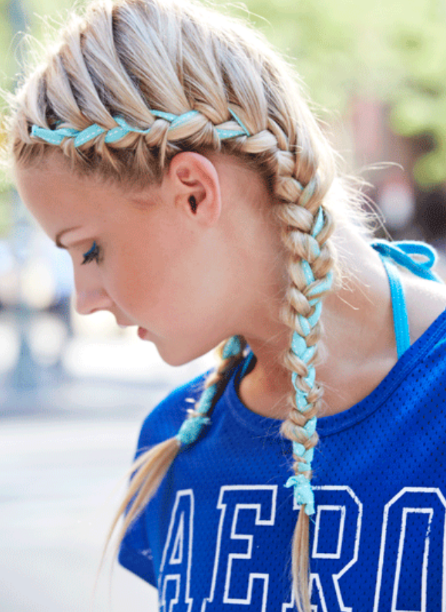
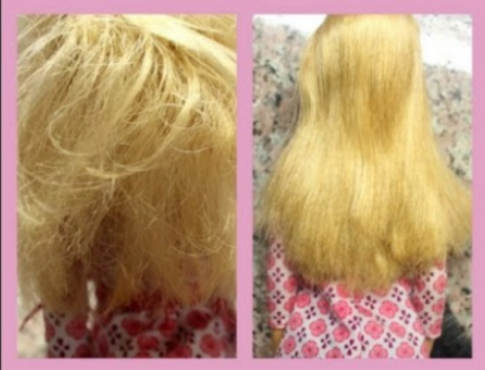
High Braided Ponytail with RibbonBraids feature massively on our list of hairstyles for toddler girls. This one mixes the practicality of a high ponytail with the romantic vibe of a four-strand ribbon braid. To create this style, with either lace, ribbon, beads or leather, simply attach the cord at the base of the ponytail, and integrate it instead of the 3rd strand in your four-strand braid. The 1st strand is brought over the 2nd and then under the next strand; and the 4th goes under the 3rd and then over the next strand. Continue this pattern to the end. At the very end, tie the braid with the ends of the ribbon and spread the edges for a lacier appearance.
Criss Cross Braids
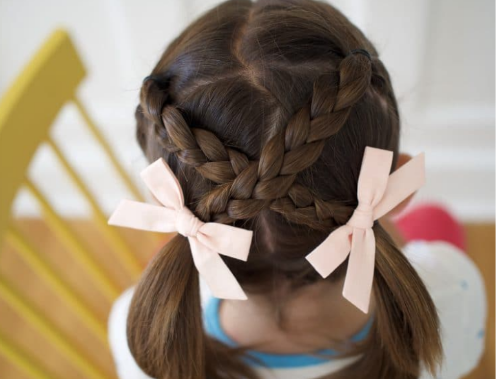
- Start with making two pig tails with just the hair at the top of their head.
- Braid those two little pigtails
- Keep the two braids OUT and put all of the rest of their hair into two big pigtails
- Take the two little pig tails, make an X and tie them into the big pigtails

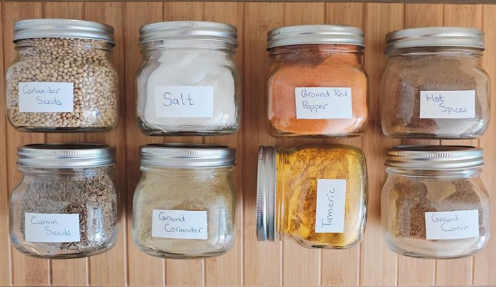
Start a Mason Jar Herb Garden
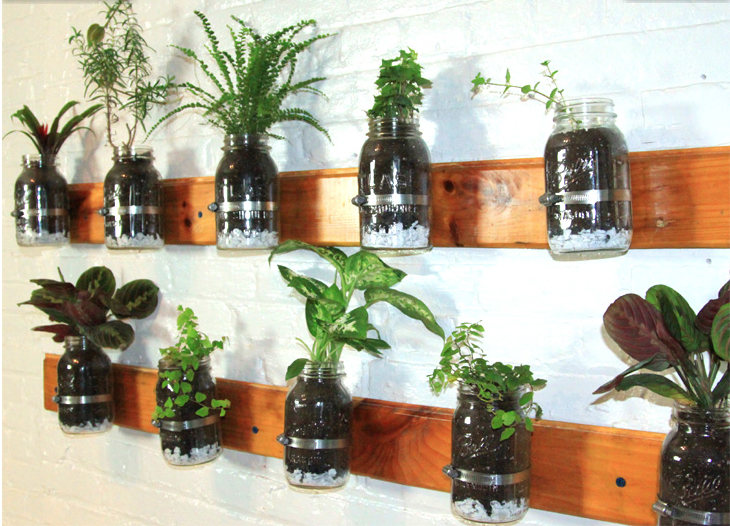
Throughout the summer, the planter boxes on my deck are loaded with herbs. I used to keep a wide variety because, well, they’re easy to grow and don’t take up much space. Eventually, I realized that growing cilantro doesn’t make much sense, since I can’t stand the stuff, and one variety of mint is probably plenty. Dill, on the other hand, is an important part of summer pickling, I’ll use parsley in just about anything and no matter now much basil I grow, it won’t be enough. Rounded out with rosemary, chives and a few others, my deck rail herb garden has become a crucial part of my summer gardening. But what happens when summer turns to fall? We move the operation indoors.
Growing herbs indoors is an easy choice when using fresh herbs are part of your kitchen routine. In past years, there has always been a bit of a scramble to find enough small containers to transplant the many herbs growing on the back porch. That wasn’t a problem this year as we embrace the ease, style and convenience of mason jar gardening.
Mason jars are readily available, inexpensive and have an innate rustic style that endures. Using Mason jars (or other recycled jars) for growing herbs is a no-muss, no-fuss solution when transplanting herbs or starting from scratch. Follow the steps below to manage drainage, growing medium, sunlight requirements and will add a bit of flair to our favorite indoor plants.
Materials
Step Two: Add Potting SoilUnlike soil, potting mix is a planting medium that includes lighter organic material like peat, composts and sometimes perlite. Potting mix (not to be confused with potting soil) provides excellent moisture retention and is a good choice for container gardening. Fill jars with potting mix to 1-2 inches below the jar rim.
Step Three: Transplant Herbs or Plant SeedsWhile a Mason jar herb garden is an easy way to transplant herbs from outdoor planter boxes for kitchen-friendly gardening, Mason jars are also a cheap and convenient way to plant herbs indoors. Follow instructions provided by seed provider for best results, but in most cases, simply sow seeds on top of potting mix, cover with an inch or so of additional potting mix and lightly water.
When transplanting herbs to Mason jars, gently pull roots apart to encourage growth, plant in jar and pack mix firmly around the roots and base of plant (top off jar). For plants with more established roots, it may be necessary to remove a little potting mix from the jar before planting. Keep roots exposed to the air for as little time as possible and water plants as soon as they are re-planted.
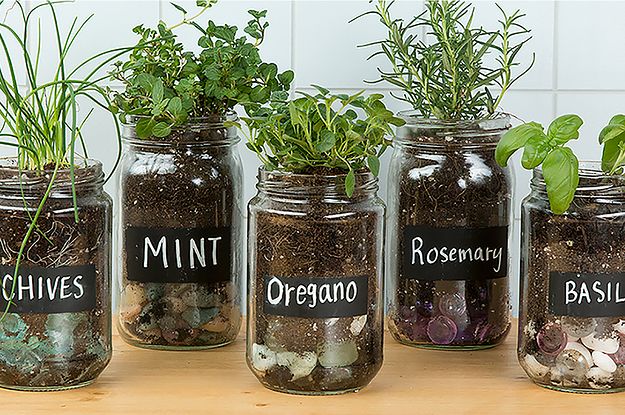
Step Four: Label JarsHerbs can be labeled using a craft stick placed in the dirt, an identification card attached to the neck of the jar or a sticker affixed to the jar itself. In most cases, your Mason jar garden will remain in plain sight, so a pretty label goes a long way toward adding a bit of flair to these functional containers.
Step Five: MaintenanceYour Mason jar garden is terrifically portable. Place jars in a location that receives at least 6 hours of sunshine a day (windowsill, countertop, etc), but enjoy the ease with which they can be moved around. Keep herbs watered, but do not overwater. Harvest your kitchen crops as needed to add flavor to whatever is on the menu.
Growing herbs indoors is an easy choice when using fresh herbs are part of your kitchen routine. In past years, there has always been a bit of a scramble to find enough small containers to transplant the many herbs growing on the back porch. That wasn’t a problem this year as we embrace the ease, style and convenience of mason jar gardening.
Mason jars are readily available, inexpensive and have an innate rustic style that endures. Using Mason jars (or other recycled jars) for growing herbs is a no-muss, no-fuss solution when transplanting herbs or starting from scratch. Follow the steps below to manage drainage, growing medium, sunlight requirements and will add a bit of flair to our favorite indoor plants.
Materials
- Quart Mason jars
- Small rocks or gravel
- Potting mix
- Herb plants or seeds
- Jar labels
Step Two: Add Potting SoilUnlike soil, potting mix is a planting medium that includes lighter organic material like peat, composts and sometimes perlite. Potting mix (not to be confused with potting soil) provides excellent moisture retention and is a good choice for container gardening. Fill jars with potting mix to 1-2 inches below the jar rim.
Step Three: Transplant Herbs or Plant SeedsWhile a Mason jar herb garden is an easy way to transplant herbs from outdoor planter boxes for kitchen-friendly gardening, Mason jars are also a cheap and convenient way to plant herbs indoors. Follow instructions provided by seed provider for best results, but in most cases, simply sow seeds on top of potting mix, cover with an inch or so of additional potting mix and lightly water.
When transplanting herbs to Mason jars, gently pull roots apart to encourage growth, plant in jar and pack mix firmly around the roots and base of plant (top off jar). For plants with more established roots, it may be necessary to remove a little potting mix from the jar before planting. Keep roots exposed to the air for as little time as possible and water plants as soon as they are re-planted.
Step Four: Label JarsHerbs can be labeled using a craft stick placed in the dirt, an identification card attached to the neck of the jar or a sticker affixed to the jar itself. In most cases, your Mason jar garden will remain in plain sight, so a pretty label goes a long way toward adding a bit of flair to these functional containers.
Step Five: MaintenanceYour Mason jar garden is terrifically portable. Place jars in a location that receives at least 6 hours of sunshine a day (windowsill, countertop, etc), but enjoy the ease with which they can be moved around. Keep herbs watered, but do not overwater. Harvest your kitchen crops as needed to add flavor to whatever is on the menu.
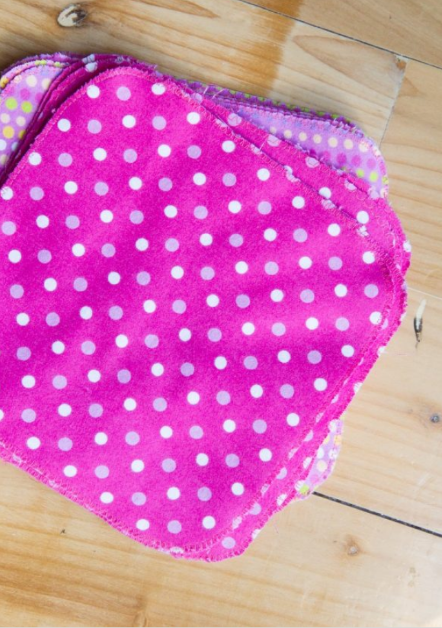
There are 4 main ingredients in wipes solutions.
(Use your favorite oil and soap) I suggest coconut oil and Earth Momma Angel Baby Shampoo and Body Wash or Dr. Bonner’s Organic Castile Soap.
-1 ½ cup distilled or filtered water
-2 tbsp melted (…coconut oil, olive oil, grapeseed oil, sunflower oil)
-2 tbsp liquid soap or baby wash
Anti-Fungal Wipes Solution
This is a good one for treating and preventing yeast infection rashes. Leave out the vinegar if using on raw skin, as it will aggravate it.
-1/2 cup distilled water
-1 tsp white vinegar
-1 tsp calendula oil
-5 drops lavender oil
-5 drops tea tree oil
-1/4 cup 100% aloe vera gel
Lavender and Tea Tree Oil Wipes Solution
Great for rash prevention
-1/8 cup olive oil
-1 ½ cup distilled water
-1 tsp baby shampoo
-2 drops tea tree oil
-4 drops lavender oil
You can play with different combinations of the oils or baby washes and shampoos to see which you like best and which works best for YOU and your baby. Just try to use organic and all natural ingredients, as they are better for baby.
I would only make one small batch at a time. Some of these ingredients act as a natural preservatives (like vinegar or tea tree oil). If you are using what you make in a few months (3-4 months) you won’t run the risk of anything going bad before you have the chance to finish it.
Any of you already make your own wipes solution at home? What is your favorite recipe?
- Water- cleanses and dilutes other ingredients. IMPORTANT: Use distilled water or boil it first (obviously let it cool before use!). If you don’t at least use filtered water, you could run it through something like a Brita filter. This helps to prevent yucky things like bacteria from growing in the water.
- Oil- I have heard of people using baby oil. I don’t suggest this as baby oil is made from mineral oil, a petroleum based product. I prefer to use oils from my kitchen instead…coconut oil, olive oil or sunflower oil.
- Soap- helps to clean tiny bums of pee and poo. Many recipes call for baby wash. I prefer an all-natural baby wash, such as Earth Momma Angel Baby Shampoo and Body Wash. Plus, the Earth Momma has a natural, yummy smell. Many commercially available washes have ingredients that are as harmful as those chemicals found in some disposable wipes.
- Essential Oils- this step is optional. Also, do you own research on safe usage as there are certain oil that can’t be used with children. If you do use them go with a quality, organic and pure essential oil (i.e. Young Living or DoTerra) and dilute properly.
(Use your favorite oil and soap) I suggest coconut oil and Earth Momma Angel Baby Shampoo and Body Wash or Dr. Bonner’s Organic Castile Soap.
-1 ½ cup distilled or filtered water
-2 tbsp melted (…coconut oil, olive oil, grapeseed oil, sunflower oil)
-2 tbsp liquid soap or baby wash
Anti-Fungal Wipes Solution
This is a good one for treating and preventing yeast infection rashes. Leave out the vinegar if using on raw skin, as it will aggravate it.
-1/2 cup distilled water
-1 tsp white vinegar
-1 tsp calendula oil
-5 drops lavender oil
-5 drops tea tree oil
-1/4 cup 100% aloe vera gel
Lavender and Tea Tree Oil Wipes Solution
Great for rash prevention
-1/8 cup olive oil
-1 ½ cup distilled water
-1 tsp baby shampoo
-2 drops tea tree oil
-4 drops lavender oil
You can play with different combinations of the oils or baby washes and shampoos to see which you like best and which works best for YOU and your baby. Just try to use organic and all natural ingredients, as they are better for baby.
I would only make one small batch at a time. Some of these ingredients act as a natural preservatives (like vinegar or tea tree oil). If you are using what you make in a few months (3-4 months) you won’t run the risk of anything going bad before you have the chance to finish it.
Any of you already make your own wipes solution at home? What is your favorite recipe?
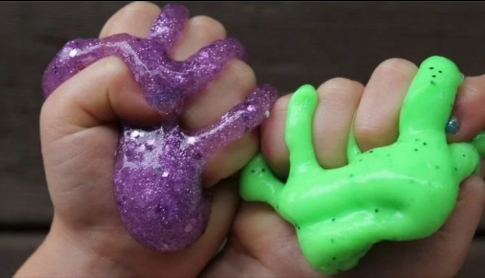
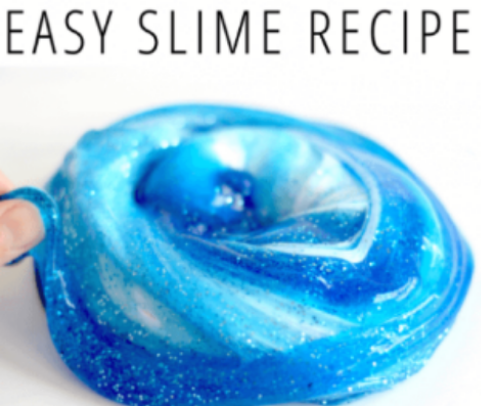
Simple Slime Recipe
This version of slime (or Gak) is made of glue and Borax.
What You Need:
What You Do:
This version of slime (or Gak) is made of glue and Borax.
What You Need:
- School glue
- Borax (Sodium tetraborate)
- Food coloring (optional)
- Water
- Two bowls
What You Do:
- In one bowl mix 1 oz. glue (about ¼ of the glue bottle) and ¼ cup water. If you want colored slime, add food coloring to the glue and water mixture. Lift some of the solution out of the container with the stir stick and note what happens.
- Add ¼ cup of Sodium Tetraborate (Borax) Solution to the glue and water mixture and stir slowly.
- The slime will begin to form immediately. Lift some of the solution with the stir stick and observe how the consistency has changed from Step 1.
- Stir as much as you can, then dig in and knead it with your hands until it gets less sticky. This is a messy experience but is necessary because it
allows the two compounds to bond completely. Don’t worry about any
leftover water in the bowl; just pour it out. - When not in use, store the slime in a plastic bag in the fridge to keep it
from growing mold.
Super Slime
The second type of slime is the same clear gooey kind that you see in the
movies. This is the real gooey deal! (This slime is non-toxic, but still keep these chemicals away from unsupervised children and wash your hands after playing with the slime.)
What You Need:
What You Do:
The second type of slime is the same clear gooey kind that you see in the
movies. This is the real gooey deal! (This slime is non-toxic, but still keep these chemicals away from unsupervised children and wash your hands after playing with the slime.)
What You Need:
- Polyvinyl alcohol (PVA)
- Borax (Sodium tetraborate)
- Beaker or jar
- Food coloring (optional)
What You Do:
- Pour ½ cup of the polyvinyl alcohol (PVA) solution into a beaker, jar, or bowl. If you want colored slime, add food coloring to the PVA solution and stir with a stir stick.
- Add 2 teaspoons of the Sodium Tetraborate (Borax) Solution into the PVA solution
and stir slowly. - Try lifting some of the solution with the stir stick and note what happens.
Once the slime has formed, you can play with it. Just don’t eat it! - Your slime will last longer if you seal it in a plastic bag and keep it in the
fridge, otherwise it will dry out or mold.
Glooze Slime
This slimy substance is made from milk.
What You Need:
What You Do:
This slimy substance is made from milk.
What You Need:
- Skim milk
- Vinegar
- Baking soda
- A coffee filter
What You Do:
- Add 7 tablespoons of skim milk to a cup and add 1 tablespoon of vinegar
to the milk. Gently stir the mixture until solids have formed. - Let the solids sink to the bottom of the mixture and then drain off the
liquid using a filter (a coffee filter works best). Let the solids drain for a few minutes. - Add ¼ teaspoon of baking soda to the solids and knead together to form a slimy mixture from milk.
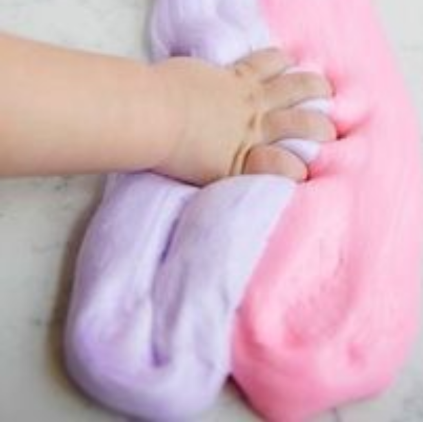
Oobleck or Quicksand Slime
Make a non-Newtonian fluid that resembles quicksand using cornstarch.
What You Need:
What You Do:
What Happened:The flow and movement of a fluid is affected by its viscosity, or how sticky and thick it is. Quicksand and the cornstarch-water mixture are both non-Newtonian fluids. Non-Newtonian viscosity changes with the type of force applied to it. The viscosity of Newtonian fluids (such as water and honey, which follow Sir Isaac Newton’s law of viscosity) is dependent only on the temperature and pressure of the fluid, not the force applied to it. For instance, warm honey (less viscous) flows much more freely than cold honey (more viscous).
Since the ability of a non-Newtonian fluid to move depends on the force or stress applied to it, these fluids do not act like ones we are more familiar with (e.g., honey or water). A light pressure, such as pouring or gently pressing the cornstarch-water mixture, allows it to move like a liquid.
Make a non-Newtonian fluid that resembles quicksand using cornstarch.
What You Need:
- Cornstarch
- Water
- A big bowl
What You Do:
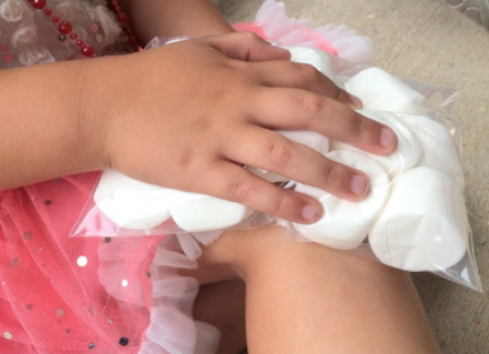
- In the plastic mixing bowl, combine small amounts of water and cornstarch together to form a mixture that looks like heavy whipping cream and has the consistency of honey. The approximate ratio of the cornstarch to water mixture is 2 cups of cornstarch to 1 cup of water. So if you use all of a regular-sized box of cornstarch (about 16 oz.), you will use about 1½ cups of water. It is best to start with less water and slowly add it until the desired consistency is reached.
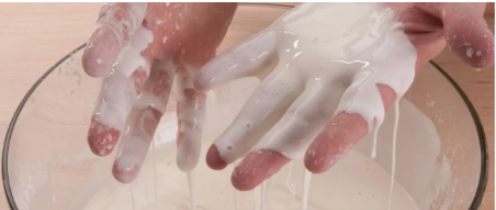
- After making your mixture, gently lay your hand on the surface of the cornstarch-water mixture. You should notice that your hand sinks in the mixture like you would expect it to do. Move your hand through the mixture, slowly first and then trying to move it really fast. Was it easier to move your hand slowly or quickly through it?
- If your mixture is deep enough to submerge your entire hand in it, try grabbing a handful of the mixture and pulling your hand out quickly. Then try again, this time relaxing your hand and pulling it out slowly. Did you notice a difference?
- Try punching the cornstarch-water mixture. (Be careful not to hurt yourself on the bowl!) Make sure to hit the substance hard and pull your fist back quickly. Did the substance splatter everywhere or did it remain in the bowl? (If it splattered, add more cornstarch.)
What Happened:The flow and movement of a fluid is affected by its viscosity, or how sticky and thick it is. Quicksand and the cornstarch-water mixture are both non-Newtonian fluids. Non-Newtonian viscosity changes with the type of force applied to it. The viscosity of Newtonian fluids (such as water and honey, which follow Sir Isaac Newton’s law of viscosity) is dependent only on the temperature and pressure of the fluid, not the force applied to it. For instance, warm honey (less viscous) flows much more freely than cold honey (more viscous).
Since the ability of a non-Newtonian fluid to move depends on the force or stress applied to it, these fluids do not act like ones we are more familiar with (e.g., honey or water). A light pressure, such as pouring or gently pressing the cornstarch-water mixture, allows it to move like a liquid.
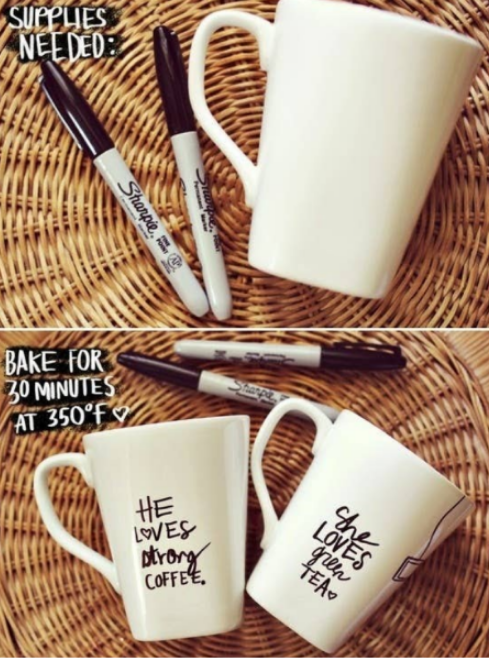
Make A Sharpie Mug
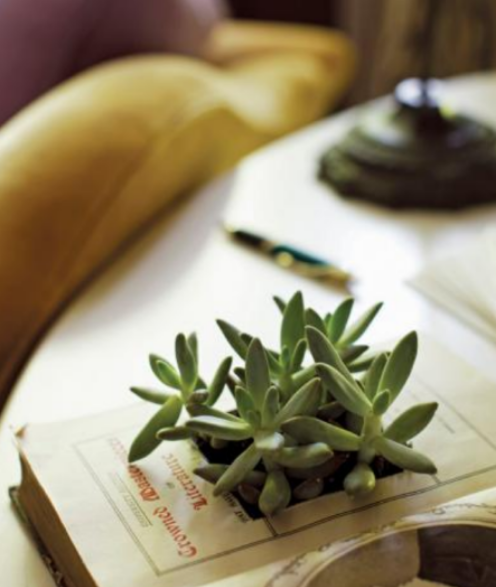
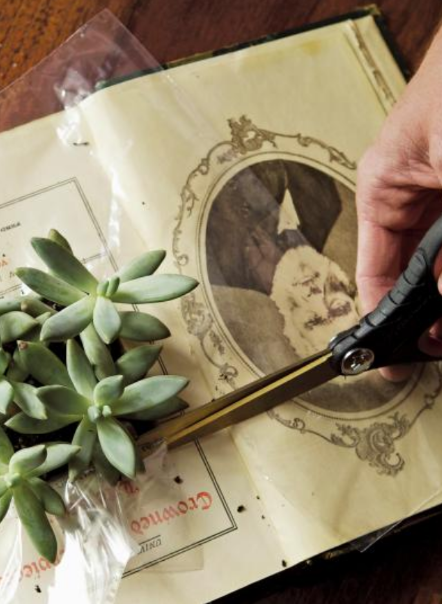
How to Make a Vintage Book Planter
Materials Needed:
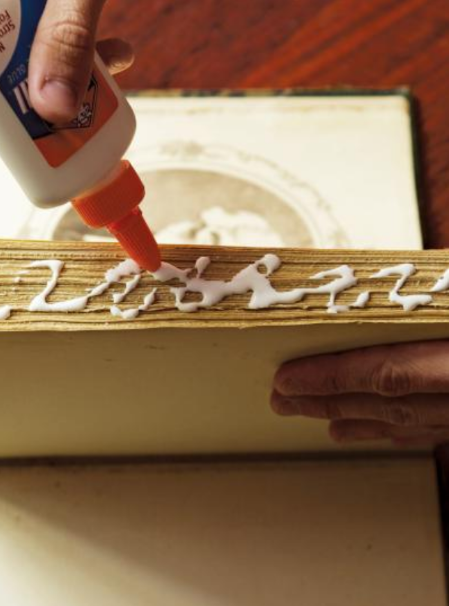
Glue Book Pages Together
Glue the pages of your book together by squiggling glue along the sides and gently pressing it into the pages with your fingers. Make sure not to glue the pages to the cover. Let dry completely, about 20 minutes
- 1 leather bound book
- white glue
- 1 small succulent
- ruler
- pen
- X-Acto knife
- 1 quart-size zip-top bag
- scissors
Glue Book Pages Together
Glue the pages of your book together by squiggling glue along the sides and gently pressing it into the pages with your fingers. Make sure not to glue the pages to the cover. Let dry completely, about 20 minutes
Measure and Mark Square for Succulent
Determine how wide of a space to cut for your succulent; you want at least 2 inches around the circumference of the roots to promote growth. Measure and trace the area you need to cut on the top page of your book.
Determine how wide of a space to cut for your succulent; you want at least 2 inches around the circumference of the roots to promote growth. Measure and trace the area you need to cut on the top page of your book.
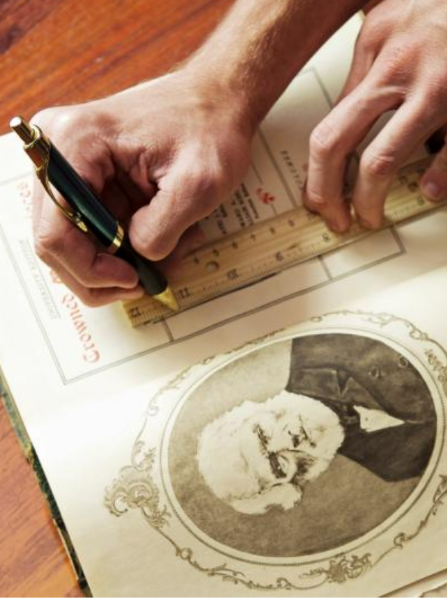
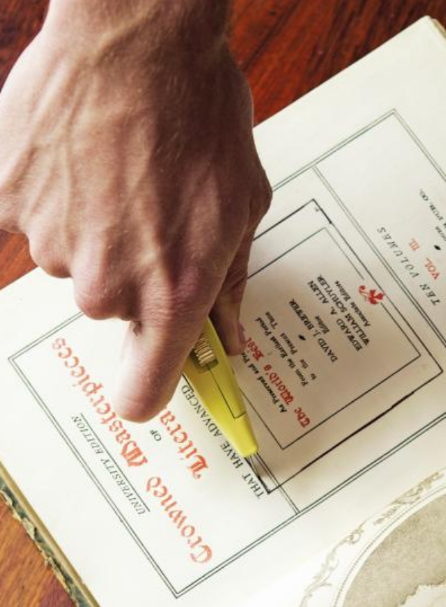
Cut Book With Craft Knife
Using your X-Acto knife, carefully cut into the box you just drew. You will only be able to cut about 30 pages at a time, so you'll need to repeat this step until you've created a hole deep enough for your succulent.
Using your X-Acto knife, carefully cut into the box you just drew. You will only be able to cut about 30 pages at a time, so you'll need to repeat this step until you've created a hole deep enough for your succulent.
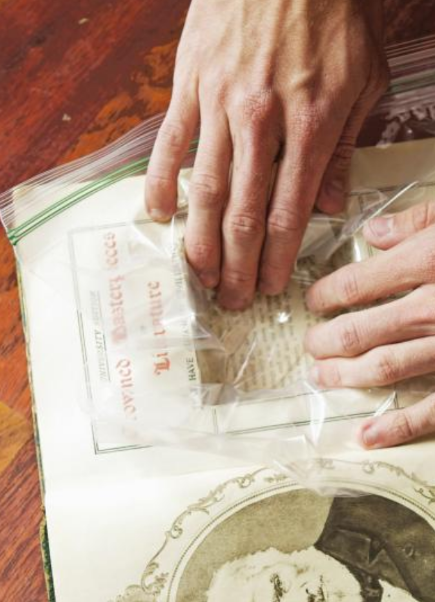
Line the Box With Plastic
Line the box you just cut with your plastic zip-top bag, making sure the bottom and sides are covered.
Line the box you just cut with your plastic zip-top bag, making sure the bottom and sides are covered.
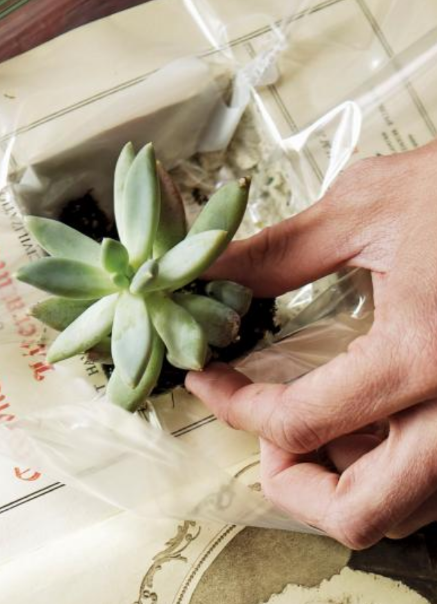
Add Succulent
Arrange your succulent on top of the zip-top bag. Be sure to transfer enough soil from the original planter, along with the plant itself.
Arrange your succulent on top of the zip-top bag. Be sure to transfer enough soil from the original planter, along with the plant itself.


 In 2006, an adult named Lori Drew created a false profile on MySpace to target her 13-year-old neighbor Megan Meier. Drew pretended to be a boy named Josh to lure Meier into a romantic relationship, only to become abusive toward her later. The distraught teenager committed suicide.
 In 2008, 18-year-old Jessica Logan committed suicide after a campaign of cyberbullying from an ex-boyfriend. While they were dating, Logan sent the boy a nude photograph of herself. When they broke up, he proceeded to distribute the photo to hundreds of students at area high schools, as well as disseminate it through social networking sites.
 In 2010, Rutgers University student Tyler Clementi committed suicide after his roommate, Dharun Ravi, surreptitiously videotaped the 18-year-old student kissing another man. Ravi streamed the footage over the Internet, making Clementi the target of harassment.


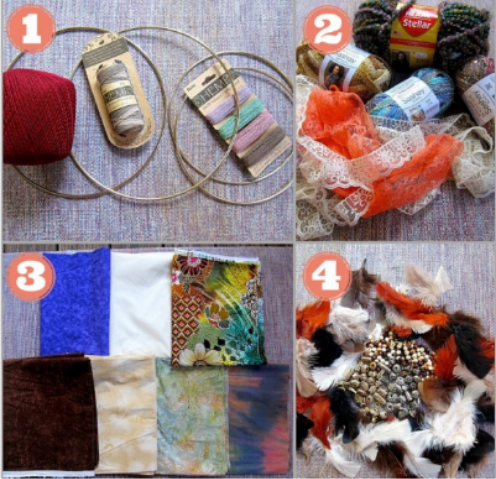
 DIY Tutorial: How to Make a Dreamcatcher – Pin now, read later!
 DIY Tutorial: How to Make a Dreamcatcher – Pin now, read later!
 DIY Tutorial: How to Make a Dreamcatcher – Pin now, read later!
 DIY Tutorial: How to Make a Dreamcatcher – Pin now, read later!
 DIY Tutorial: How to Make a Dreamcatcher – Pin now, read later!
 DIY Tutorial: How to Make a Dreamcatcher – Pin now, read later!
 DIY Tutorial: How to Make a Dreamcatcher – Pin now, read later!
 DIY Tutorial: How to Make a Dreamcatcher – Pin now, read later!
 DIY Tutorial: How to Make a Dreamcatcher – Pin now, read later!